I now have in my image a view of New York City by the Hudson river, covered by a light fog. We can see the Brooklyn Bridge above the city and the Statue of Liberty in the foreground. I will now add the text.
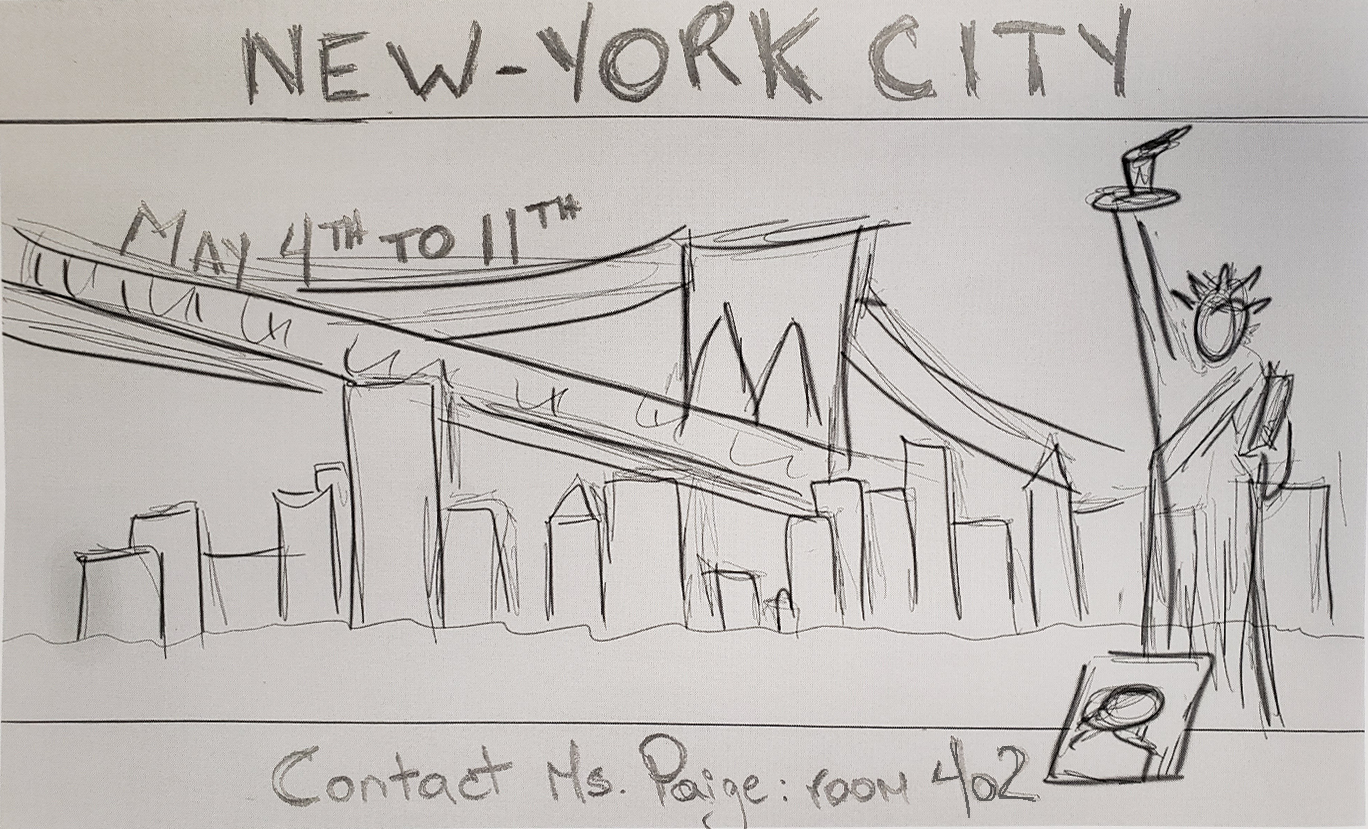
I will take another look at the sketch I drew at the beginning, during the planning.
I need to insert the text NEW YORK CITY at the top and the date underneath. I will write "Contact Ms. Paige: room 402" at the bottom.
How can I insert text in Photoshop and what are my options? The links below should provide a good answer:
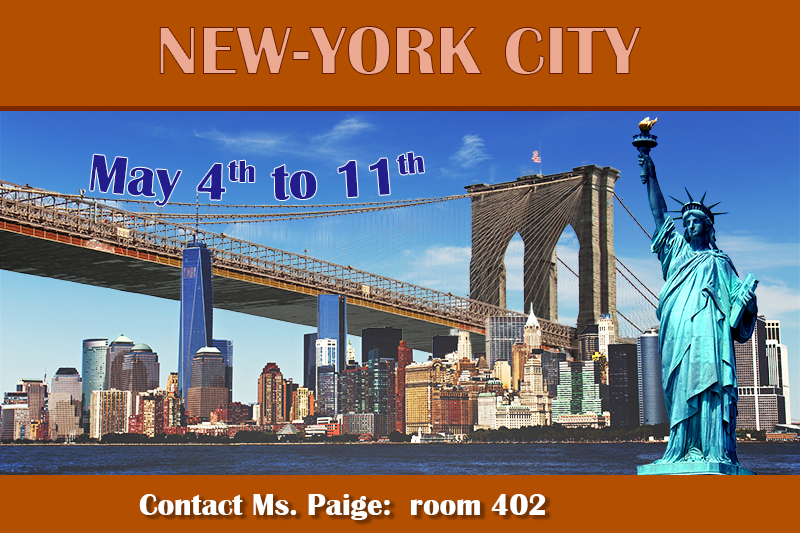
Here's what I want to achieve in the end (except for the picture of Ms. Paige, which I will insert later):
Let's go one step at a time. I'll start with inserting the rectangle shapes at the top and at the bottom, on top of which I will place my texts.
The first link above showed me how to insert shapes. I could go back and watch it again if I need to.
I will explain below how I will go about creating those orange rectangles at the top and at the bottom of the poster. Let's notice that there is also a darker line underneath the top rectangle.
My answer:
It should be something like this:
thumb_up
I will first click on the topmost layer to make sure my rectangle is going to be inserted above. Then, I will select the Rectangle tool in the toolbar. I will drag my mouse to draw a rectangle at the top of the poster.
I can refer to the image as a model for the size and colour.
I will draw another rectangle for the darker line just underneath the upper rectangle. (Note: I could also use the Line tool.)
Finally, I will draw the rectangle at the bottom.
I will now do those operations in Photoshop. I will click on the button below when I'm finished.
Now that I have my rectangles, I can insert the texts.
I'll start with the text NEW YORK CITY.
I notice that the colour of the text is lighter but the outline is darker.
How am I going to do this? I'll explain in the box below:
(I can go back and watch the video about text and shapes again if I need to.)
I answered:
Let's check below if I'm on the right track:
thumb_up
I will click on the layer containing my rectangle at the top to make sure my text will be stacked on top.
I will next select the Text tool, click at the top in my rectangle and type the text NEW YORK CITY. I picked to font Britannic Bold.
I will adjust the size and colour.
I will then double-click on my text layer and select the style Stroke. I will adjust the size to about 6 px and pick a darker colour (about the same colour as the line under the rectangle).
I'm ready to get it done in Photoshop. I'll click on the button below when I'm finished.
Let's continue. My next step will be the text in the bottom rectangle. I want to write: Contact Ms. Paige: room 402.
I'm noticing that the text has a drop shadow...
How am I going to do this?
My answer:
I'll make sure that's about what I wrote:
thumb_up
I will click on the layer containing the bottom rectangle to make sure the text will be placed above it.
I will next select the Text tool, click at the bottom, in my rectangle, and type the text "Contact Ms. Paige: room 402". I picked the same font, Britannic Bold.
I will adjust the size and colour.
I will then double-click on the text layer and select the style Drop Shadow. I picked the following values:
Opacity: 35%, Angle: 149°, Distance: 35px, Spread: 27px, Size: 29px.
That's what I will do now in Photoshop. I'll click on the button below when it's all done.
OK. I now have my text lines at the top and at the bottom. All that is left is the date.
The text seems to follow the curve of the bridge... How can I do that? Didn't I see somewhere how to make a text follow a path?
Paths... I know how to do those now. I had some practice when I selected the shirt's outline.
I'm sure one of those videos above had something about that. I could also do a search of my own on the Internet. I could search for terms such as "Type on a path Photoshop CC", I'm sure something will come up.
I'll click on the button below when I know how to do it.
Now that I know how to type some text on a path, I'll make sure that the dates, May 4th to 11th, follow the curve of the bridge.
I'll explain below how I'm going to do it:
My answer:
I'm going to make sure I have this right:
thumb_up
I will select the Pen tool and trace a line that will follow the curve above the cable of the bridge. Next, I will select the Text tool and place my pointer on the curved line. When the icon of my cursor changes, I will click and type my text: May 4th to 11th.
Now, all I need to do is change the size, the colour and the font. I will also use a Stroke layer style in white.
Let's do all of this in Photoshop and click on the button below when it's done.